So you’re using Windows/Linux and want to build an iOS app eh?
I’ll tell you now that it won’t be easy, but hopefully you can learn from my pain. In this guide I will show you how to build, test, and launch on the app store without access to a mac or iPhone.
Spoiler: You actually will need an iDevice but it’s possible to do this without touching one yourself. I’ll show you how.
If you’re new to Flutter then check out the first post in the series below!
Flutter promises the ability to build apps on Android, iOS, and even other platforms - all within a single codebase.
Does it live up to the hype? Absolutely. But the challenge is not with Flutter, it’s Apple.
First things first you need an Apple account. Make one here.
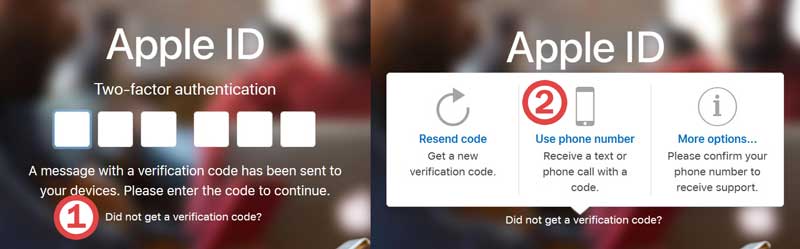
Next you need to set up 2 factor authentication. Apple’s phrasing is weird here but they have 2 concepts:
You need to do both. You will need authentication to create the apple developer account, but will use verification to log in.
Firstly set up 2 factor verification and use your phone number to receive texts. This is how you will log in after the dev account setup.
Secondly you will need to set up 2 factor authentication to create the Apple developer account and publish apps. This is where your physical device comes in - you’ll need to associate it to account. Ask a friend or family member if you can use theirs (btw thanks Mom!)
Follow this page to set up 2 factor authentication on an iDevice. Note that:
From now on you will be prompted to confirm the login via your iDevice using 2 factor auth. You can simply bypass this by choosing the ‘Did not get a verification code?’ option to use your phone number.
Once you’re setup you can sign up for the Apple developer account here. Simply pay the $99 (!) fee and you’re ready to go!
Flutter itself works well on iOS without much issue. It’s the 3rd party packages that often require iOS specific code or extra installation steps (especially Firebase).
If you’re currently developing your app then you need to take lots of notes when installing new packages.
Once you’ve built the app on Android you can go back through your notes to ensure everything looks good before trying to deploy on iOS.
I didn’t take notes and left everything to the end - this was a pain because I had to find parts of my app where I needed iOS specific code… save yourself the effort and document your iOS needs before you need them.
If you’ve already built your app then go through each and every package you’ve added and read the iOS install instructions. Also carefully examine your code to ensure that you’ve added iOS specific code where needed.
Many packages (especially ones like Firebase) have specific config which you need to use on iOS. Follow their instructions carefully. I had to update my Flutter code as follows:
Some package may require more than just code changes - yes you may have to use XCode. I’ll explain how in the following sections.
I really wanted to avoid using a mac but it was unfortunately necessary. There’s a 90% chance you will need to too. There are 2 reasons you’ll need to use a mac - installing certain packages via XCode and testing.
Unfortunately some packages need more than a pub package install to work. Sometime you may need XCode to configure your app properly. I had to use XCode to install these packages:
If you don’t use special permissions or more sophisticated packages then you might be ok without a Mac. If you do then you’ll need to rent a Mac for minor development.
I highly recommend you rent a mac anyway just to test your app. Testing and debugging your app without a device or simulator is a serious PITA. I hoped I could deploy and the app would just work - how naïve was I eh?
Save yourself the trouble and rent a mac. Running VSCode and the iOS simulator on a Mac feels just like developing on Windows.
If you decide you need to rent a Mac then I suggest macincloud. I got access for 1 month at $20.
At that price you get 3 hours of access per day which more time than I could endure per day 😅
Setup was generally painless. The instance comes with VSCode + XCode installed and I used Github to quickly access code. Next install Flutter and you’re almost set.
If you use Windows then I found this command useful to add Flutter to my path after install:
export PATH="$PATH:/Users/<user>/<install_path>/flutter/bin"
If using VSCode then you should be ready to go. Run the app just like you would in Windows/Linux and an iOS simulator should popup.
Keyboard shortcuts mostly replace ‘Control’ with the ‘Win’ key if using a Window keyboard - i.e. ‘copy’ on a Mac with a Windows keyboard is Win + C.
Use the search bar in the top right to search for apps.
The Finder app is like Windows explorer.
Copy a file path to the clipboard by right clicking on a file, clicking ‘file info’, then highlighting the path and copying it.
XCode is the iOS IDE and Simulator is like the Android emulator but for iOS.
You only have to use XCode to set up the extra config for certain 3rd party packages - use VSCode for all Flutter code.
You may also find that XCode updates a ton of config files when updating options. This is why installing some packages without XCode is not really possible at this time.
Ensure that you enable Firebase by enabling in the AppDelegate.swift file.
import UIKit
import Flutter
import Firebase

@UIApplicationMain
@objc class AppDelegate: FlutterAppDelegate {
  override func application(
    _ application: UIApplication,
    didFinishLaunchingWithOptions launchOptions: [UIApplication.LaunchOptionsKey: Any]?
  ) -> Bool {
    FirebaseApp.configure()
    GeneratedPluginRegistrant.register(with: self)
    return super.application(application, didFinishLaunchingWithOptions: launchOptions)
  }
}
My Firebase packages also needed a Podfile which is not generated by Flutter. My app only worked after XCode automatically generated one for me and I added config for the Firebase Analytics and Dynamic Link packages as per their instructions.
iOS requires that you include descriptions when you need to use a permission.
If you use a package like permission_handler you need to add these descriptions for ALL permissions even if you don’t use them. This is because Apple’s static analyser will see the API calls and assume they are being used.
Add them like this to your Info.plist file:
<key>NSAppleMusicUsageDescription</key>
<string>Music access not used but required by permissions API.</string>

<key>NSCalendarsUsageDescription</key>
<string>Calendar access not used but required by permissions API.</string>
Find all keys and further instructions here.
Apple will reject your app if the build ID or version number has already been used under certain circumstances.
An example version code (as defined in your pubspec.yaml file) is 1.1.1+12 - the 1.1.1 part is the version number and the +12 is the build number.
Ensure that you update the build ID if uploading a new app archive to Apple (i.e. adding a new test build).
Ensure that you update the version number if releasing a build publically to the app store.
I highly suggest you use the flutter_launcher_icons package to generate your app icons.
One thing with iOS is that you cannot use transparency in your app icon. If using PNG you can’t even have the transparency layer so export PNGs with the transparency setting turned off in a program like Photoshop.
Testing in-app purchases sucked. I followed the instructions to a T yet I could not get them to work on iOS
Thanks to this thread and this thread I was able to solve the issue. It turns out you must:
I couldn’t even test in-app purchases until these were complete.
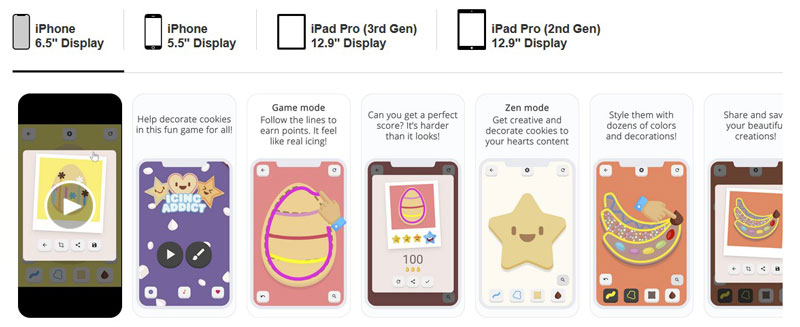
The store has very specific asset size and content rules. Ensure that you follow the requirements or your app will be rejected when submitted.
You will need to make at least 2 sized sets of assets (for 5.5” and 6.5” iPhones) plus an additional set if supporting the iPad. Images must be the exact sizes they specify here.
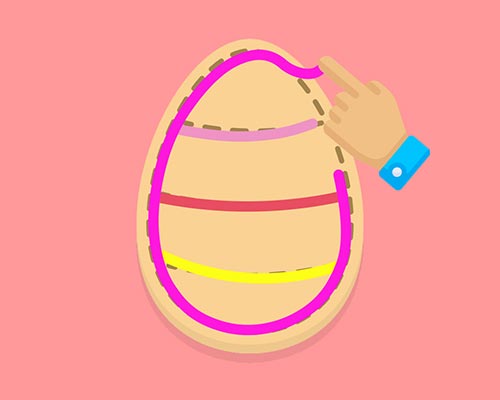
I used a simple image format which could be resized to the two set sizes like below.
Also ensure that your screenshots don’t contain Android UI elements or chrome or your app will be rejected.
Just like with images, the video size and duration is very strict as specified here.
You will need a video for the two iPhone dimensions plus an additional size if supporting iPad. Videos must be less than 30s long.
Like with the images I used the same video but added taller back bars to fit the two set sizes. Similarly ensure that your videos don’t contain Android UI elements or chrome.
One extra thing is that Apple mandate that you use Safari and OSX 10+ to upload videos… like seriously, wtf?
Simply bypass this by switching your user agent with a browser extension.
If using macincloud then you can manually upload your built app to Apple. Follow the Flutter deploy guide here and you should be good.
Note that builds take aaaages (like 20+ minutes) on the cheapest macincloud instance.
If you want to automate your deployment then I can recommend CodeMagic to deploy your iOS app automatically. They have a good blog with useful guides to help you.
I suggest that you only set this up after deploying yourself. Trying to debug issues via the CodeMagic build logs will drive you insane. Also note that you get 500 free build minutes per month but each build will take 30-75 minutes on their free instances.
I find the App Store connect site super unintuitive to use sometimes. Here are some things to note:
Once submitted your app will be reviewed by Apple. Thankfully their review process is quite good and only takes a day or so for me.
Trying to deploy on the app store was by far the most frustrating part of making my app. For $99 I got a convoluted, badly documented, badly designed developer experience. Also the fact they force you to use a mac and iDevice is insane to me.
The Google Play Store isn’t perfect either but Apple seriously takes the cake on painful developer experiences.
I sincerely hope you have a better experience than I did. I wish you the best of luck. Reach out if you ever need a shoulder to cry on!