Hey bru! I’ve launched 2 apps in the past month which both use the algorithm I’ll discuss today. It’s a line smoothing algorithm which I think is applicable for a variety of applications.
In this post I’ll discuss the algorithm itself and how I implemented it in Flutter.
Just just getting started with Flutter? Check out my first post here.
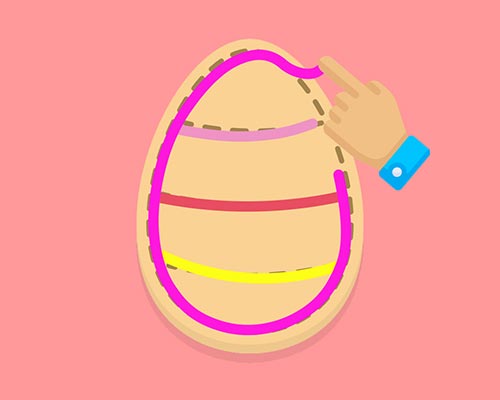
Check out the video to see my algorithm in action.
A couple things to notice here:

I also use the algorithm for my snake inspired game Squiggle Snek. It allows me to draw the snake body nice and smooth.
But this is just what I use it for, it has potential for many more uses. In fact I’ve seen similar concepts used by Adobe and various apps/websites around the place.
Enough talk, let’s see how it works!
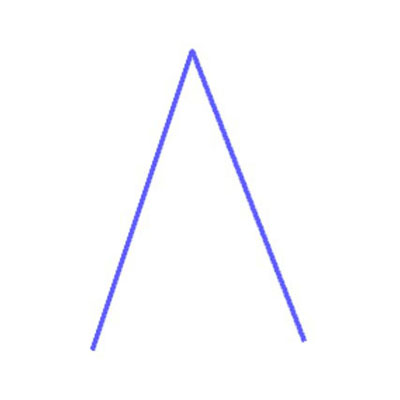
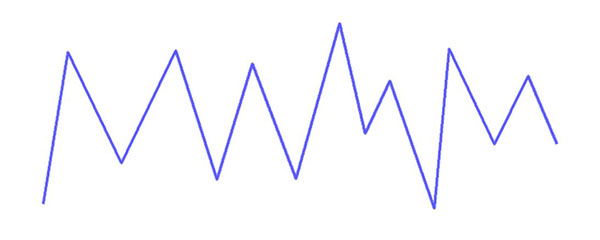
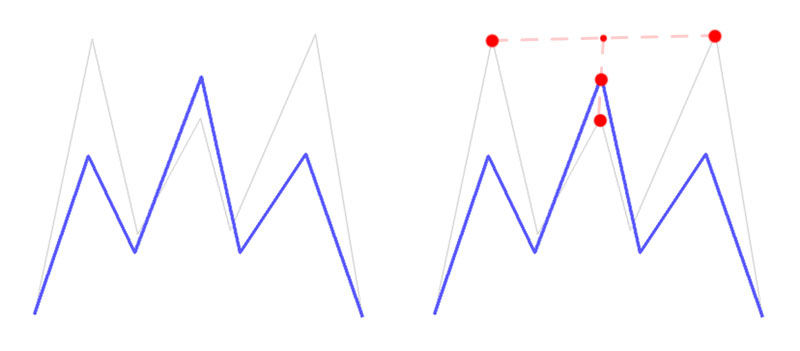
Imagine you have 3 points in a line like this. How would you go about smoothing it?
My approach was to try average the lines together to flatten the peak. In this case the middle peak is pulled towards the centre of the two connected points at the bottom like this:
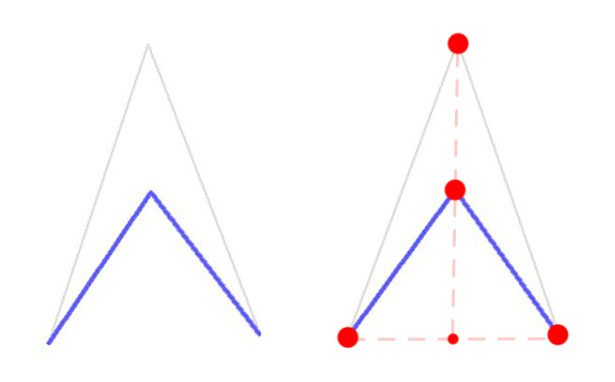
You can see this is done easily by averaging the positions of the bottom points, then averaging that position with the top point.
What would it look like on a longer line?
The process is the same, we just have to do it for each point down the line.
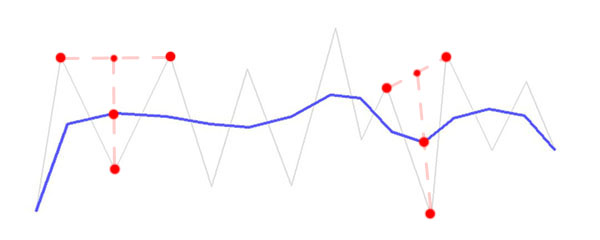
Sweet, it actually smoothed out! Notice that each point is in the middle of it’s adjacent points.
So far so good but we’re not using many points yet. We need to scale it up.
Now that we know how to smooth a line, how does it work in the real world?
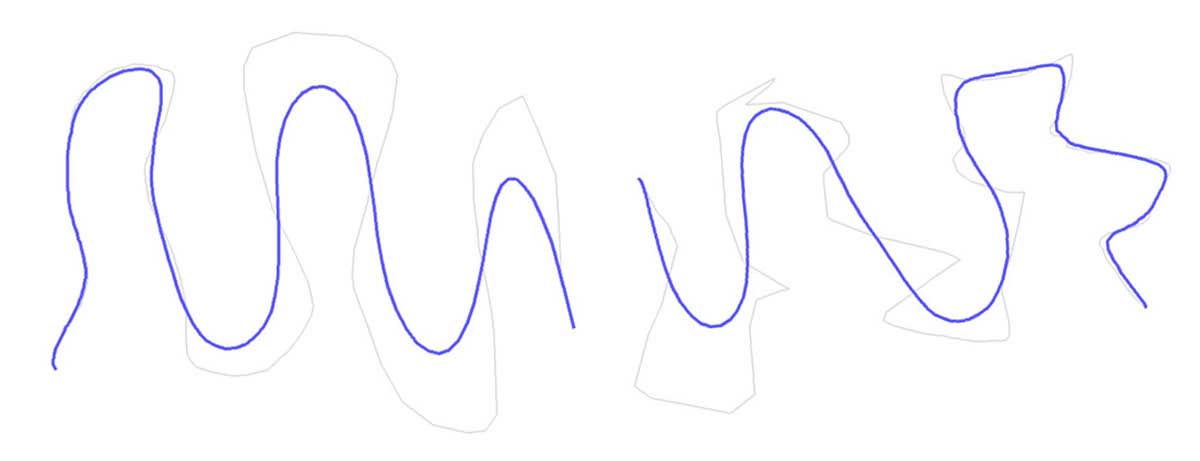
When you draw a line you get thousands of points that are very close together - often just pixels apart. How would our algorithm perform in this case? Something like this:
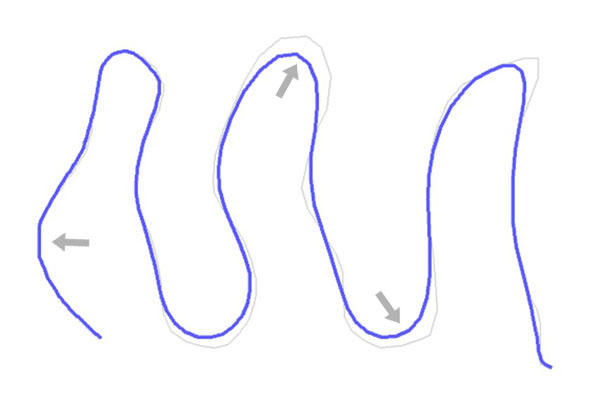
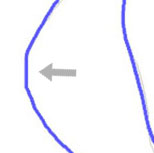
Pretty nice right? But there are just a few problem areas which I’ve marked with arrows.
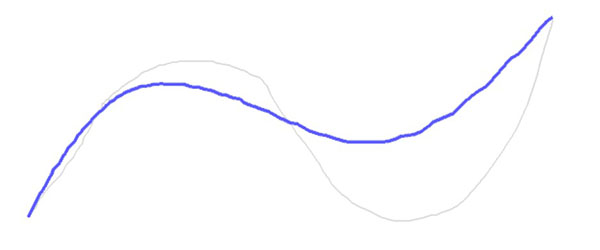
Firstly it’s highly dependant on the distance between points. Smaller gaps will result in less smoothing. Larger gaps will result in over smoothing. Take this example:
This example is exaggerated but represents a real scenario. When users move really fast the points are further away from each other. When they go slow the points are much closer.
You can see that the algorithm will produce different results for each drawing style. So to ensure that the smoothing is consistent I normalise the line so that the gap between points is within a consistent range. I’ll explain more in the next section.
Secondly the algorithm as-is is too fine grained. Points only interact with the ones directly next to them so larger line features can still look bumpy.
To combat this I apply a super smooth process which I explain later.
As I mentioned before, one issue with the algorithm is that it’s highly affected by how close points are to each other. To combat this I add/remove points to ensure that the gap between points is within a certain range.
Here’s an example - the red dots represent the points. Notice some are far away and some are very close together.
After normalising the line the points would be more evenly distributed. Something like this:
Now when we smooth the line the points behave similarly. Remember our example from before?
It would smooth out like this after being normalised:
Now that we can control the gap distance the smoothing will behave consistently regardless of how fast/slow the user draws their line.
This is the basic process of how it’s done:
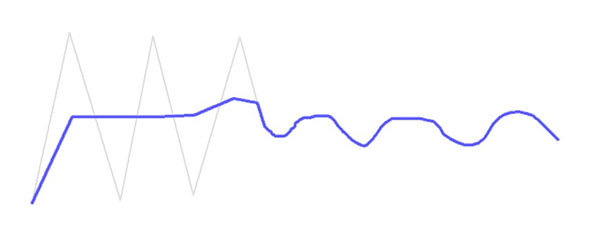
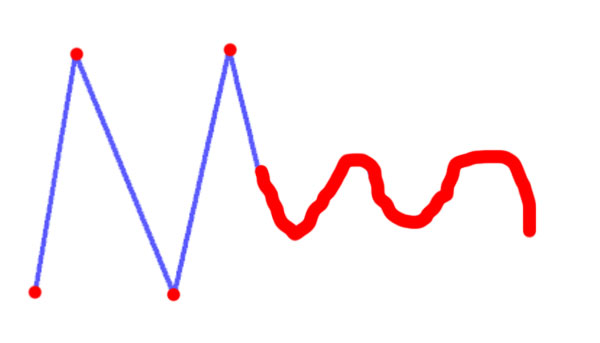
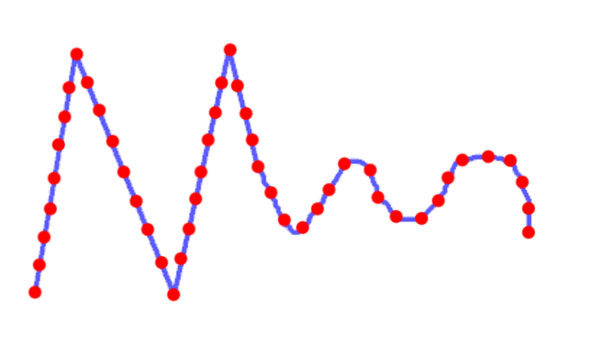
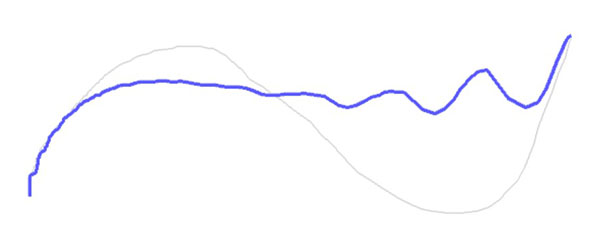
As I mentioned before the algorithm is too fine-grained. Even after we normalise the line we will still see bumps. This is because we’re smoothing out individual points, not bigger line features.
Take this line for example. We can see it has been smoothed out yet it still has bumps. The points have been smoothed, but the bigger features make it look bumpy.

We could remove points but we’ve already normalised the line by now. We don’t want to reduce the amount of information we have to play with.
Instead I adjusted the algorithm slightly. Rather than smooth a point with just it’s direct neighbours, I added the ability to use points further away.
In this example you can see how the smoothing uses the points 2 positions away instead of just 1 like before.
Let’s go bigger. Below is the process applied using points 5 positions away. Note that I ran the smoothing process a number of times.
And here is another using points that are 10 positions away. Again I ran the process multiple times.
Notice something? Yeah it looks crap! You can see that points bunch up to create ugly artefacts.
But at least the points are interacting with a wider spread of neighbouring points. They’re affecting larger features of a line now.
Fixing the artefacts turned out to be quite easy. I simply run the smoothing process with 20, 18, … , 2, 1 positions away in succession. The result looks like this:
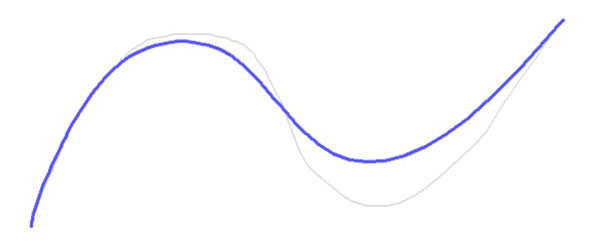
Buttery smooth right? So now the algorithm will smooth out the bigger features first, then slowly refine the line into beautiful buttery goodness. The result is a super smooth line 👌
So to turn this algorithm into actual icing I simply run the algorithm live as the user draws. The smoothing gives the icing that ‘sticky’ feeling.
This is the basic idea:
That’s it! You can now implement your very own buttery smooth smoothing algorithm. Go make some icing, snakes, or whatever you can think of. Path smoothing has a lot of uses I reckon.
The final step of the process is making this thing performant. You can imagine that if you let the user draw indefinitely the list will get HUGE.
Given that the algorithm loops over the list a lot, you can see that the number of computations scales linearly with the length of the line.
Eventually this will degrade the performance of your app. In practise I found my app to slow down within seconds of drawing.
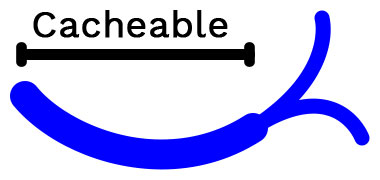
The combat this I ‘cache’ the smooth portion of the line and only deal with the end.
Notice in the image that the two lines at the end share the same beginning portion. This occurs because the algorithm is proximity based. New points will eventually stop affecting older ones.
Now I only ever have to process a small segment of the line at any time. The result is a fast algorithm that that can run continuously as the user draws.
Baring the actual algorithm implementation, how could we perform this type of processing and render it in Flutter? You know I love them, it’s another mixin!
In this example the PathSmoother class holds my smoothing algorithm logic. I then expose some helper methods to interact with it from a stateful widget.
import 'package:flutter/material.dart';

mixin ButterySmoothIcing<T extends StatefulWidget> on State<T> {
  PathSmoother _smoother = new PathSmoother();
  List<IcingPath> _oldPaths = [];

  startSmoother(Offset position) => _smoother.start(position);
  updateSmoother(Offset position) => _smoother.add(position);
  endSmoother() => {
      _oldPaths.add(_smoother.path());
      _smoother.finish();
  }

  Widget drawIcing() {
    var paths = List.of(_oldPaths);
    var currentPath = _smoother.path();
    if (currentPath) paths.add(currentPath);
    return EasyPaint(IcingPainter(paths));
  }
}

class IcingPath {
    Path path;
    Color stroke;
    double strokeWidth;
    IcingPath(this.path, this.stroke, this.strokeWidth);
}
Below is an example of how you would actually use the mixin and interact with it as the user draws.
import 'package:flutter/material.dart';

class DrawIcingWidget extends StatefulWidget {
  @override
  createState() => DrawIcingWidgetState();
}

class DrawIcingWidgetState extends State<DrawIcingWidget> with ButterySmoothIcing {

    Widget build(BuildContext context) {
        return GestureDetector(
            onPanDown: (DragDownDetails details) => setState(() {
                startSmoother(_position(details.globalPosition));
            }),
            onPanUpdate: (DragUpdateDetails details) => setState(() {
                updateSmoother(_position(details.globalPosition));
            }),
            onPanEnd: (DragEndDetails details) => endSmoother(),
            child: Stack( children: [
                Cookie(),
                drawIcing(),
            ]),
        );
    }

    /// Converts a global coordinate to a local one
    Offset _position(Offset globalPosition) {
        RenderBox referenceBox = context.findRenderObject();
        return referenceBox.globalToLocal(globalPosition);
    }
}
To render the paths I call my custom painter EasyPaint(IcingPainter(paths)). This works as follows:
import 'package:flutter/material.dart';

class EasyPaint extends CustomPaint {
  EasyPaint(CustomPainter painter) : super(painter: painter, size: Size.infinite);
}

class IcingPainter extends CustomPainter {
  final Iterable<IcingPath> paths;
  IcingPainter(this.paths);

  @override
  void paint(Canvas canvas, Size size) {
    var paint = Paint()
      ..strokeCap = StrokeCap.round
      ..strokeJoin = StrokeJoin.round;

    for (var path in paths) {
      paint
        ..color = path.stroke
        ..strokeWidth = path.strokeWidth
        ..style = PaintingStyle.stroke;
      canvas.drawPath(path.path, paint);
    }
  }

  bool shouldRepaint(IcingPainter other) => true;
}
I highly recommend you draw all paths using a bulk canvas draw method like canvas.drawPath or canvas.drawPoints. Looping over points manually and using the canvas.drawLine method was very slow.
I also use a Path object in this example but you could directly substitute that for List<Offset>.
That’s it for this post, hope you liked it bru! Catch you next week 👋