Hey bru. Last month I launched my first app Icing Addict - one of 12 startup projects I’m building this year. This series is a deep dive into how I built it.
Just getting started with Flutter? Check out the last post or the game itself here:

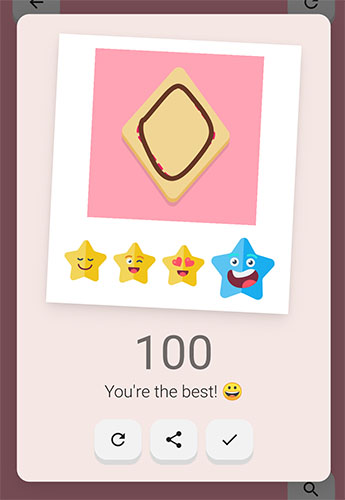
Ok so the premise of my game is that you have cookies you can decorate. In the game mode you follow a ‘guide path’ and get points for how close you are.
Check out the image to the right.
The problem is that the icing is sticky. It doesn’t follow your finger exactly, and you need to mould it into place (a deep dive into that algorithm coming soon).
So first up I have to draw a cookie, but I want the file format to satisfy the following:
If I used a normal image then it’s not scalable and I can’t store the guide path data. So what can I do? SVGs to the rescue! 😎
Read up what SVGs are here if you’re not familiar; but essentially they describe how to draw an image rather than just store the image like JPGs or PNGs.
They’re also XML files, which means they’re often tiny and can store any data you want!
Here’s the basic SVG structure of one of my cookies.
<svg xmlns="http://www.w3.org/2000/svg" viewBox="0 0 500 500">
    <path class="shadow" d="..." opacity="0.1" />
    <path class="edge" d="..." fill="#edc78d" />
    <path class="base" d="..." fill="#fad294" />
    <path class="target" d="..." fill="none" stroke="#a2824c" stroke-dasharray="20" stroke-linecap="round" stroke-linejoin="round" stroke-width="8" />
    ...
</svg>

So not only does this file draw the cookie itself, I can do cool stuff at runtime like:
The image above shows an example cookie with the guide path the user follows.
So to draw an SVG in Flutter, use the flutter_svg package. Render a simple SVG from file like this:
import 'package:flutter_svg/svg.dart';

class MyWidget extends StatelessWidget {
    Widget build(BuildContext context) {
        return SvgPicture.asset("path/to/svg/asset");
    }
}
Make sure you update your pubspec.yaml file with the assets (files or folders) you want to use.
assets:
- path/to/svg/assets/
Sometimes complex SVGs can take time to load. When the library receives an SVG to render it must read the file from disk, parse all of the information, then dynamically render it.
The result is that sometimes SVGs will flash onto screen just after everything else loads. This was happening on my tutorial pages which tarnished the experience. No one wants content jumping around.
So how can we prevent this? Preloading!
Thankfully the SVG library caches SVGs so that future renders are super fast.
Here’s a helpful function I use to preload them:
import 'package:flutter_svg/flutter_svg.dart';

Future<SvgPicture> loadSvg(BuildContext context, String path) async {
  var picture = SvgPicture.asset(path);
  await precachePicture(picture.pictureProvider, context);
  return picture;
}
I use this before entering my tutorial screen for instance. I preload the first few SVGs from the home page, then load the rest once the user starts the tutorial. The result is a snappy experience.
Kick off a few preloads with the Future.wait() function like this:
Future.wait([
    loadSvg(context, "svg_1.svg"),
    loadSvg(context, "svg_2.svg"),
    ...
]);
Ok so we can render an SVG, but how can we manipulate them on the fly? I dove into the flutter_svg code to figure this out myself.
Check out the video to see me update various SVGs dynamically like:
To achieve this I highjack the SVG decoding process as follows:
I created a gist here which does this (requires the xml package).
Here’s how I use it in one of my buttons which dynamically changes the SVG colour:
class ZenButtonCookie extends StatelessWidget {
  final CookieColor color; // My internal color object. Adapt this for your needs.
  const ZenButtonCookie(this.color);

  @override
  Widget build(BuildContext context) {
    return SvgOverride(
      "path/to/svg.svg",
      hash(path, color),
      (elem) => processElement(elem, color),
    );
  }

  // Ensure the hash uniquely identifies the transformations you will do
  static hash(String svgPath, CookieColor color) => hashValues(svgPath, color?.base, color?.edge);

  // Do manipulation magic here
  static processElement(XmlElement elem, CookieColor color) {
    var setAttr = SvgOverride.setAttr;
    var getHex = SvgOverride.getHex;

    switch (elem.getAttribute('class')) {
      case 'base':
        setAttr(elem, "fill", getHex(color?.base));
        break;
      case 'edge':
        setAttr(elem, "fill", getHex(color?.edge));
        break;
    }
  }
}
The hashing here is important. If we cache by file name only, the library won’t re-render changes as we make them (because the old SVG is returned).
If we provide a random hash then the SVG will always re-render when the screen updates. This can be slow like I explained above.
Anyway now you can update an SVG as it renders! So when you change the input - say when you update a colour - the SVG updates and is cached properly.

This section deviates from the main topic a little, but I think it’s still quite interesting.
Like I said before, I wanted my SVGs to contain the guide path data used for scoring.
I’ve shown you how you can render the guide path (it’s just an SVG element of course), but now I’ll show how I extract that data for my scoring calculation.
What I need to do is extract just the guide path elements from the cookie SVG file (the elements with a class of target).
First I read the SVG file from disk as a string like this:
import 'package:flutter/services.dart';

Future<String> readFile(String filePath, {isTest: false}) async {
    return isTest
        ? new File(filePath).readAsString()
        : rootBundle.loadString(filePath);
}
I convert to XML and filter out the guide path elements (requires the xml package).
import 'package:xml/xml.dart';

// How I read SVG files
Future<XmlDocument> readSvg(String filePath, {isTest: false}) async {
  var content = await readFile(filePath, isTest: isTest);
  var xmlRoot = parse(content);
  return xmlRoot;
}

// How I filter out specific elements
Iterable<XmlElement> getXmlWithClass(XmlDocument root, String classId) {
  return root.descendants
      .whereType<XmlElement>()
      .where((p) => p.getAttribute('class') == classId)
      .toList();
}
Now that I can extract the guide path elements, I have to convert them into actual Path objects.
The good news is that the SVG library does this behind the scenes. The bad news is that it doesn’t expose those methods.
I ended up copying this file into my project which exposes the xmlToPath function. Perfect!
The final step before scoring is to convert a Path object into a list of coordinates (Offset objects). We basically walk along the path with a certain step size like this:
/// Convert a path into a list of offsets.
List<Offset> pathToCoords(Path path, [double pixelGap = 2]) {
    var metrics = path.computeMetrics();
    if (metrics.length == 0) return [];

    var coords = <Offset>[]
    var metric = path.computeMetrics().first;

    double position = 0;
    while (position < metric.length) {
        var tangent = metric.getTangentForOffset(position);
        coords.add(tangent.position);
        position += pixelGap;
    }

    return coords;
}
Phew! That was a lot of work to do before we can even start the actual scoring bit.
At this point I have the ‘guide paths’ and the user’s ‘drawn paths’. To calculate the score I have to compare them. Easy right?
Well these paths can have lots of coordinates each, and a brute force solution would have me compare every point of one path with every point of the other. This is super slow so I need a better way.
My solution was to build up a k-d tree for each path and compare them. This brings an n^2 solution down to n log(n). Way faster!
I use this package to do the job. It’s a little awkward to use but gets the job done.
To give you a sense of how many operations I save, lets say each path has a modest 100 coordinates each.
At n^2 a brute force comparison would be 100 x 100 operations totalling 10,000 calculations.
A k-d tree inserts and searches with log(n) time. As you’ll see in a minute I have to build up 2 trees, then search each tree against each other. This means I do 4 operations of n log(n) totalling under 3000 calculations. A 70% saving!
If we scale that up to 1000 coordinates each, those numbers reach 1,000,000 and 40,000 respectively. A 96% saving!
These aren’t exact numbers of course, but they give you a sense of how much faster and scalable the optimisation is.
Finally I can score this thing! What I do is take the maximum distance from these two operations:
A low distance = the paths are closer = a higher score!

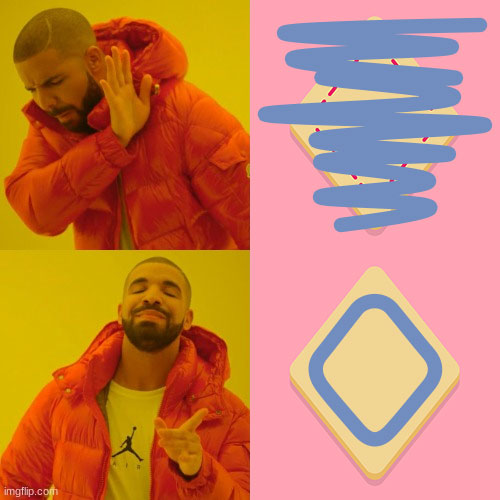
Why compare them twice? Well lets say a user completely covers the whole screen with icing.
The first operation will return a high score because every guide path point is close to a drawn path point. However the score should be low because they completely mess up the cookie!
By performing the second operation we ensure the drawn paths are close to the guide paths, and that the user has only drawn near the guide paths.
I hope that makes sense. Drake understands.
Well that’s it for now! Tune in next time for more Flutter goodies.